
Restoring a database in SQL Server is a core DBA task.
Whether you’re responding to an incident, performing disaster recovery testing, migrating data, or rebuilding an environment, restores need to be predictable, repeatable, and verifiable.
This post walks through restoring a database using both T-SQL and SQL Server Management Studio, along with the checks that matter before and after the restore completes.
When You Typically Restore a Database
You’ll usually restore a database when:
- Recovering from data loss or corruption
- Rebuilding or refreshing environments
- Migrating databases to new hardware or storage
- Configuring features like Always On or mirroring
- Validating backups as part of DR testing
The mechanics are straightforward. Problems usually come from skipping validation or clean-up steps.
Restore a Database Using T-SQL
For repeatable work, automation, or multi-database restores, T-SQL is usually the safest option.
Many DBAs use the SSMS wizard to generate a script, then adjust and run it manually.
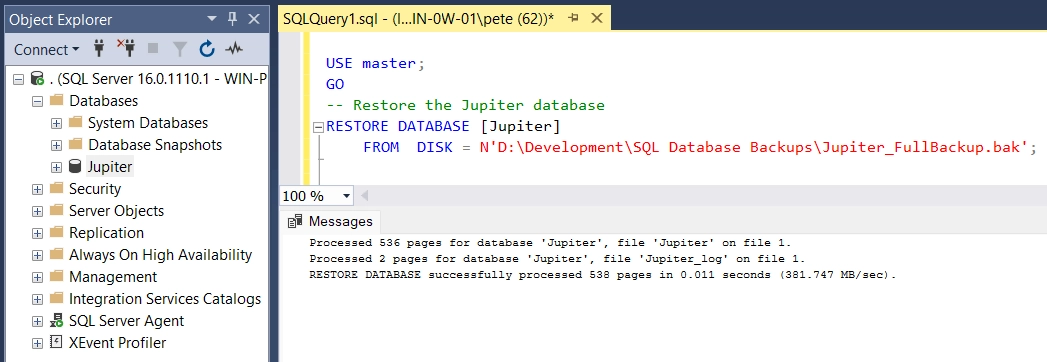
Example: Restore a Database from a Full Backup
USE master;
GO

RESTORE DATABASE [lemonadestand]
FROM DISK = N'C:\temp\lemonadestand_full_11082022.bak';
If the backup is valid and no additional restore steps are required, SQL Server will bring the database online automatically.
Restoring a Database from Multiple Backup Files
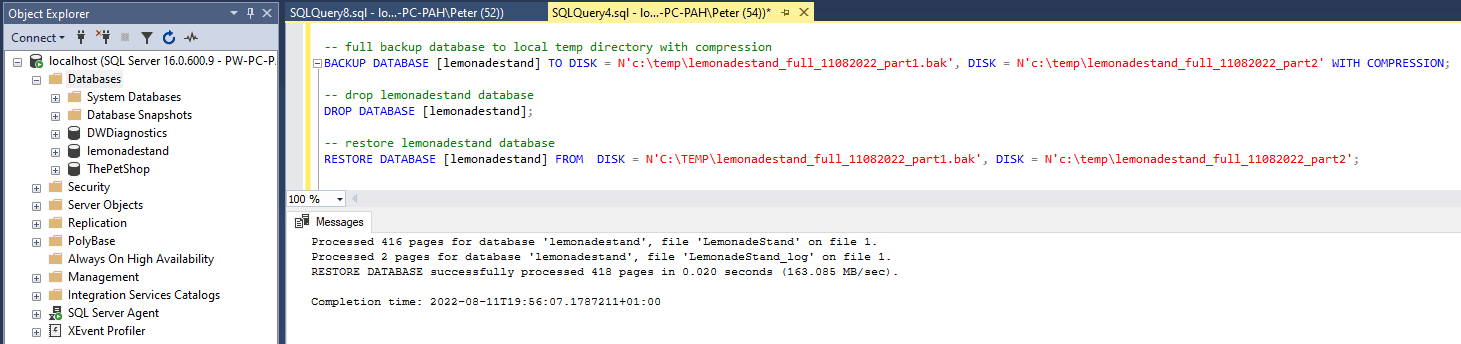
Large databases are often backed up using multiple files to improve throughput or manage storage.
When restoring, list all backup files in the same RESTORE command.
RESTORE DATABASE [lemonadestand]
FROM DISK = N'C:\temp\lemonadestand_full_part1.bak',
     DISK = N'C:\temp\lemonadestand_full_part2.bak';
SQL Server reads from all files and restores the database as a single operation.
That works because those files are one striped backup, a single backup written across several devices at once. Two separate full backups are not a stripe, and the two ways of getting it wrong give different errors.
- Msg 3132, The media set has 2 media families but only 1 are provided. All members must be provided. You have a stripe and you listed only part of it.
- Msg 3231, The media loaded on “…” is formatted to support 1 media families, but 2 media families are expected according to the backup device specification. The files you listed are separate backups, not members of one set.
If you are holding a .bak and do not know which it is, read the label before you restore. FamilyCount is the number of files the restore will demand, and one member is enough to ask.
RESTORE LABELONLY FROM DISK = N'C:\temp\lemonadestand_full_part1.bak';On one member of a two-file stripe that returns FamilyCount 2. On an ordinary single-file backup it returns 1.
Restore a Database Using SSMS
The SSMS restore wizard is useful when you need visibility, file relocation, or quick validation.
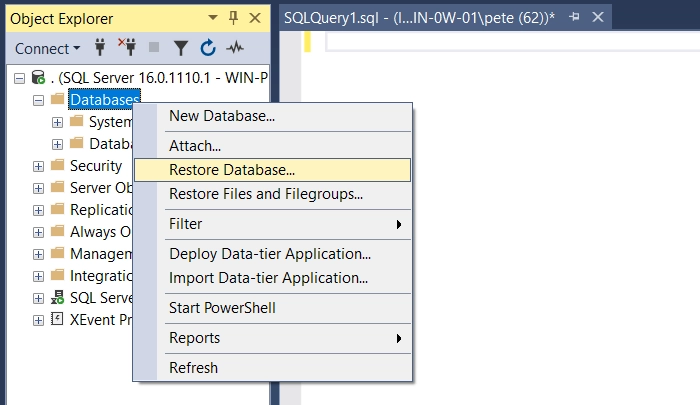
Step 1: Open the Restore Wizard
Right-click Databases in Object Explorer and select Restore Database.
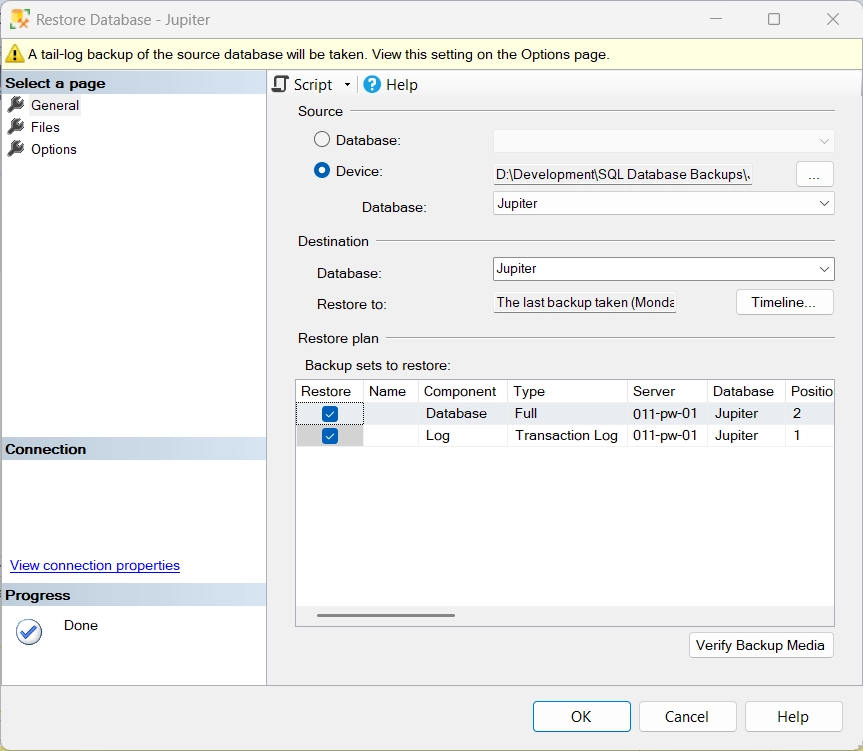
Step 2: Select the Backup File
Choose Device as the source, browse to the backup location, and select the .bak file.
Multiple files can be selected if required.
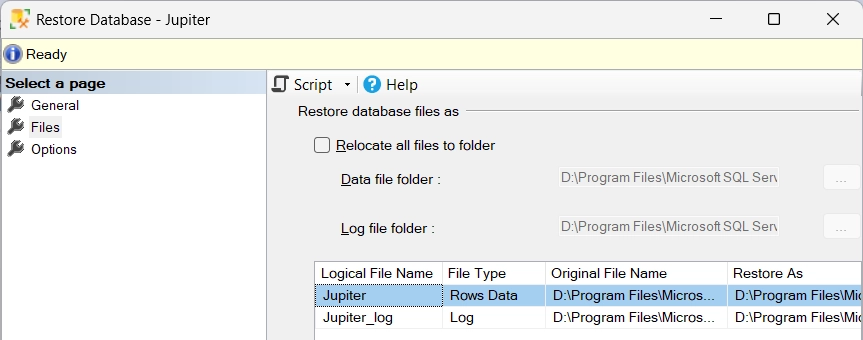
Step 3: Review and Relocate Data and Log Files
Before running the restore, always check the Files tab.
This shows where SQL Server will place the data and log files. Adjust paths if:
- Restoring to a different server
- Storage layouts differ
- You want to avoid default directories
Options Tab (What Actually Matters)
You usually only need to check a few things here:
- Overwrite the existing database
Required when restoring over an existing database. - Preserve replication settings
Only relevant if replication is configured. - Recovery state
Leave as WITH RECOVERY unless you are restoring additional files or logs.
Everything else is rarely needed for standard restores and can usually be left at default values.
Verify the Restore Completed Successfully
After any restore, always verify the database state.
SELECT name, state_desc
FROM sys.databases
WHERE name = 'lemonadestand';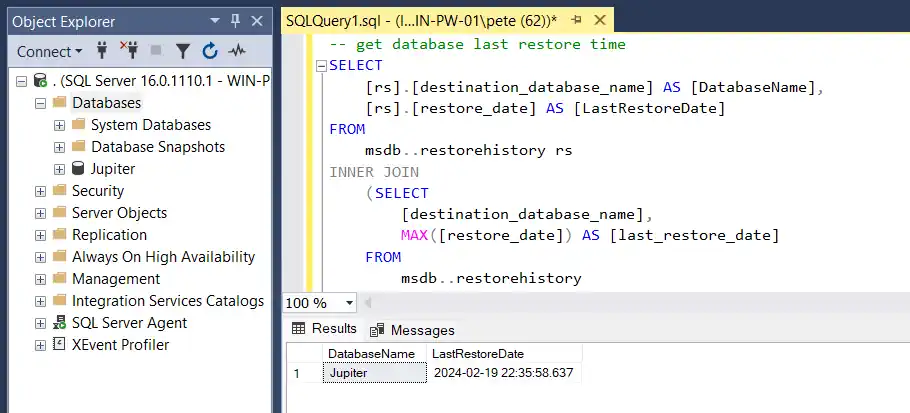
You are looking for ONLINE. Anything else and the restore has either not finished or not finished cleanly, so stop and investigate before going any further.
State is not the whole check though. Compatibility level, recovery model and owner all come across from the source database, and any of the three can be wrong for the server the database has just landed on. Read them in the same query:
SELECT name,
       state_desc,
       recovery_model_desc,
       compatibility_level,
       SUSER_SNAME(owner_sid) AS owner
FROM sys.databases
WHERE name = 'lemonadestand';
The compatibility level is the one that catches people. A database keeps the level it had on the source server, so a backup taken from SQL Server 2016 comes up at 130 on a SQL Server 2025 instance whose own default is 170. Restoring it does not upgrade it, and nothing warns you.
Final Thoughts
Restoring a database should never feel rushed.
When you combine:
- Scripted or controlled restores
- File location verification
- Post-restore validation
- Supporting checks for progress and history
you remove most of the risk from recovery work.
This post, together with the related restore and backup checks, forms a solid, practical baseline for real-world SQL Server restore operations.
A restore is rarely a single step. These cover the parts either side of it, and the two places it most often goes wrong.
- Restore From a Newer SQL Server Version (Error 3169), the one failure RESTORE DATABASE gives when the backup came from a newer build
- Restore Testing: Proving the Backups Actually Work, the restore walkthrough should point at proving it worked
- Check Backup and Restore Progress, how far through a long restore actually is.
- Get Last Database Restore Date and Time, prove when a database was last restored.
- Backup Failed or the Restore Is Stuck, where to go when the restore in this walkthrough does not finish
- Database Cannot Be Opened, It Is in the Middle of a Restore, when the database is stuck in RESTORING and nothing will open it.
- Why Is the Database in Recovery Mode, when it comes back but stays unusable.
- Kill All User Sessions on a Database, clear the connections that stop the restore starting.
- Unable to Open the Physical File (Error 5120), what to check when the restore fails on the data file rather than the backup.
- Backup and Recovery Scripts, coverage, chain integrity and history checks.
Leave a Reply