Running PowerShell as Administrator is required for many system-level tasks such as configuring Windows, installing software, or running administrative scripts.
Below are the most reliable ways to open PowerShell with elevated privileges on Windows.
Quick method (fastest)
If you already have a PowerShell window open, run:
# Open PowerShell as Admin
Start-Process powershell -Verb runas
You’ll be prompted by User Account Control (UAC). Click Yes to open an elevated PowerShell session.
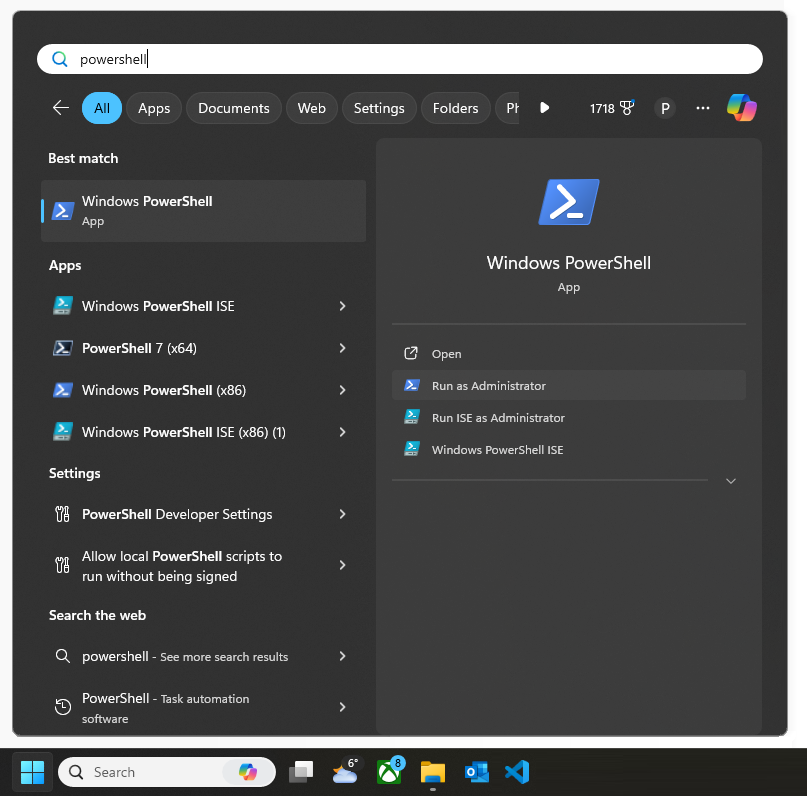
1. Open PowerShell as Administrator from the Start Menu
Windows 10 / Windows 11
- Press the Windows key
- Type PowerShell
- Select Run as administrator
To do this on Windows 7 or 8, the steps are slightly different. I would recommend upgrading your OS to a supported version.
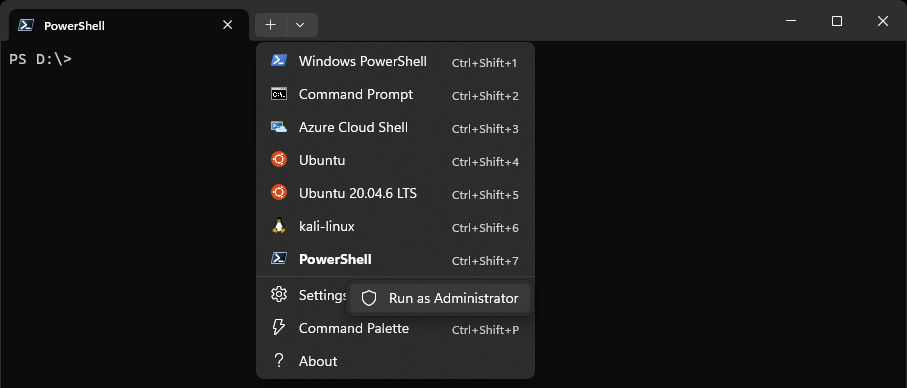
2. Open PowerShell as Administrator using Windows Terminal
Windows Terminal is the default terminal application on Windows 11 and supports PowerShell profiles.
To open PowerShell as Administrator:
- Right-click Windows Terminal
- Select Run as administrator
Or, if PowerShell is your default shell:
- Hold CTRL
- Click the + icon to open a new elevated tab
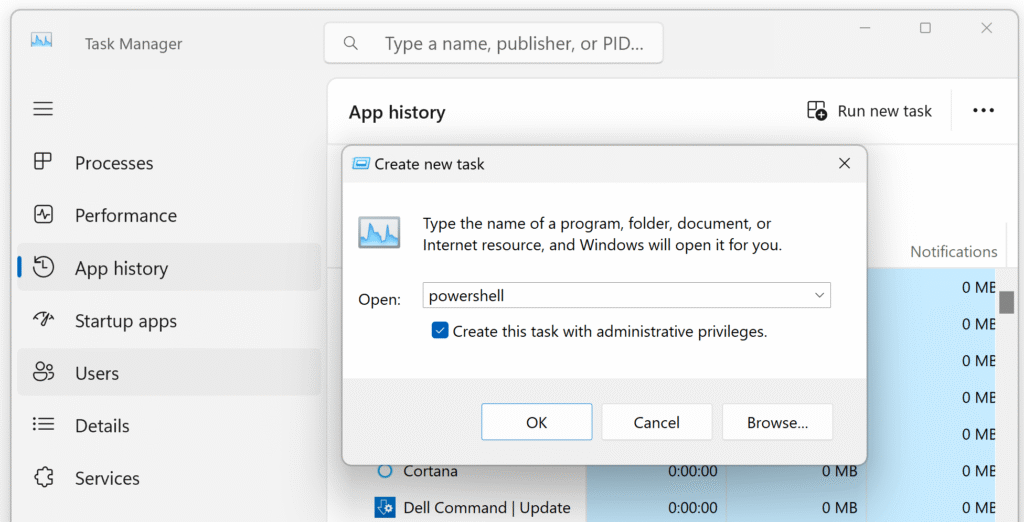
3. Open PowerShell as Administrator from Task Manager
This method is useful if the Start Menu is unavailable.
- Press Ctrl + Shift + Esc to open Task Manager
- Click Run new task
- Type
powershell - Check Create this task with administrative privileges
- Click OK
An elevated PowerShell window will open.
Notes
- Many PowerShell scripts require administrator rights to modify system settings
- If scripts fail unexpectedly, check whether the session is elevated
- Windows Terminal does not always open as admin by default
Related
- Installing Windows Terminal on Windows
- PowerShell execution policy errors
- Common PowerShell scripts for Windows administration
Leave a Reply