TCP/IP must be enabled in SQL Server for remote connections to work.
If it’s disabled, applications can’t connect; even if authentication, ports, and firewall rules are all correct.
This post shows two reliable ways to enable TCP connections in SQL Server:
- SQL Server Configuration Manager (recommended)
- PowerShell (useful for automation and repeatability)
Both approaches require a service restart before changes take effect.
When You Need to Enable TCP/IP
You usually need to check or enable TCP/IP when:
- Applications cannot connect remotely
- You are setting up a new SQL Server instance
- Migrating databases or rebuilding servers
- Configuring Always On, mirroring, or replication
- Troubleshooting intermittent connectivity issues
Named Pipes may still work locally, but remote clients almost always rely on TCP/IP.
Enable TCP/IP Using SQL Server Configuration Manager
This is the safest and most common method, especially on production servers.
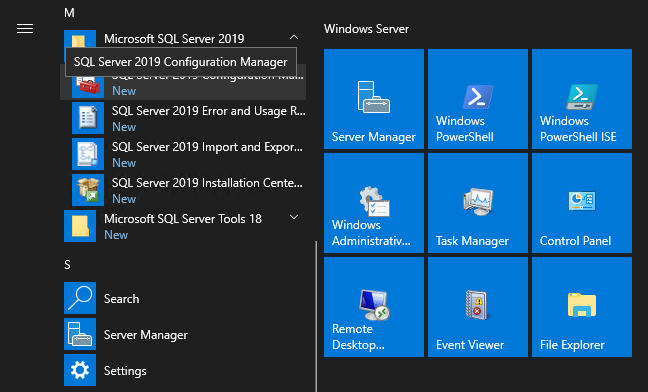
Step 1: Open SQL Server Configuration Manager
Launch SQL Server Configuration Manager from the Start menu.
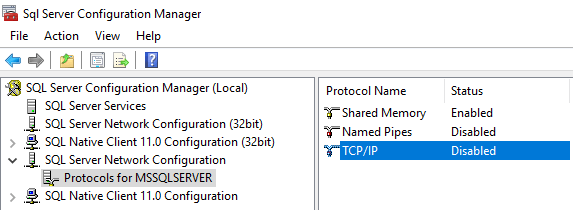
Step 2: Locate TCP/IP Protocol
Navigate to:
SQL Server Network Configuration → Protocols for <InstanceName> → Double-click TCP/IP.
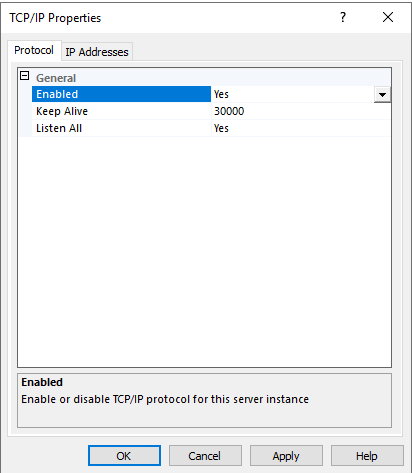
Step 3: Enable TCP/IP
On the Protocol tab:
> Set Enabled = Yes
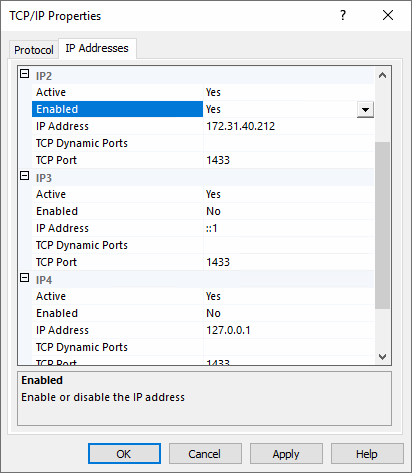
> Review the IP Addresses tab if you need to control ports
> Click Apply.
Step 4: Restart the SQL Server Service
TCP/IP changes do not apply until the SQL Server service is restarted.
Navigate to SQL Server Services and restart the appropriate instance.
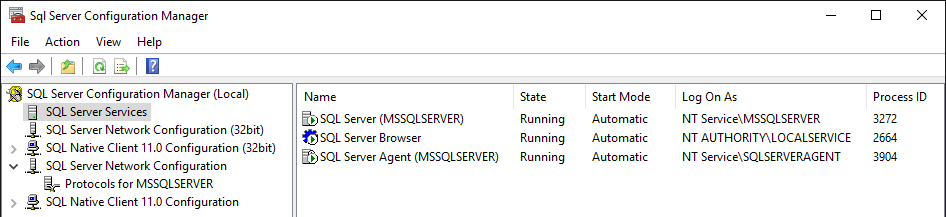
Plan this restart deliberately. Enabling TCP/IP always requires a service restart, and on busy systems this is a change that should be scheduled, not done casually.
Enable TCP/IP Using PowerShell
PowerShell is useful when:
- Automating server builds
- Managing multiple servers
- Working in locked-down environments
- Avoiding manual GUI steps
This script enables TCP/IP and Named Pipes, then restarts the SQL Server service.
⚠️ This requires SQL Server management libraries and will restart the SQL Server instance. Always review and test before running on production systems.
# Enable TCP and Named Pipes for default instance

Import-Module SqlServer

$smo = 'Microsoft.SqlServer.Management.Smo.'
$wmi = New-Object ($smo + 'Wmi.ManagedComputer')

# Enable TCP/IP
$tcpUri = "ManagedComputer[@Name='$env:COMPUTERNAME']/ServerInstance[@Name='MSSQLSERVER']/ServerProtocol[@Name='Tcp']"
$tcp = $wmi.GetSmoObject($tcpUri)
$tcp.IsEnabled = $true
$tcp.Alter()

# Enable Named Pipes
$npUri = "ManagedComputer[@Name='$env:COMPUTERNAME']/ServerInstance[@Name='MSSQLSERVER']/ServerProtocol[@Name='Np']"
$np = $wmi.GetSmoObject($npUri)
$np.IsEnabled = $true
$np.Alter()

# Restart SQL Server service
$service = $wmi.Services['MSSQLSERVER']
$service.Stop()
Start-Sleep 2
$service.Start()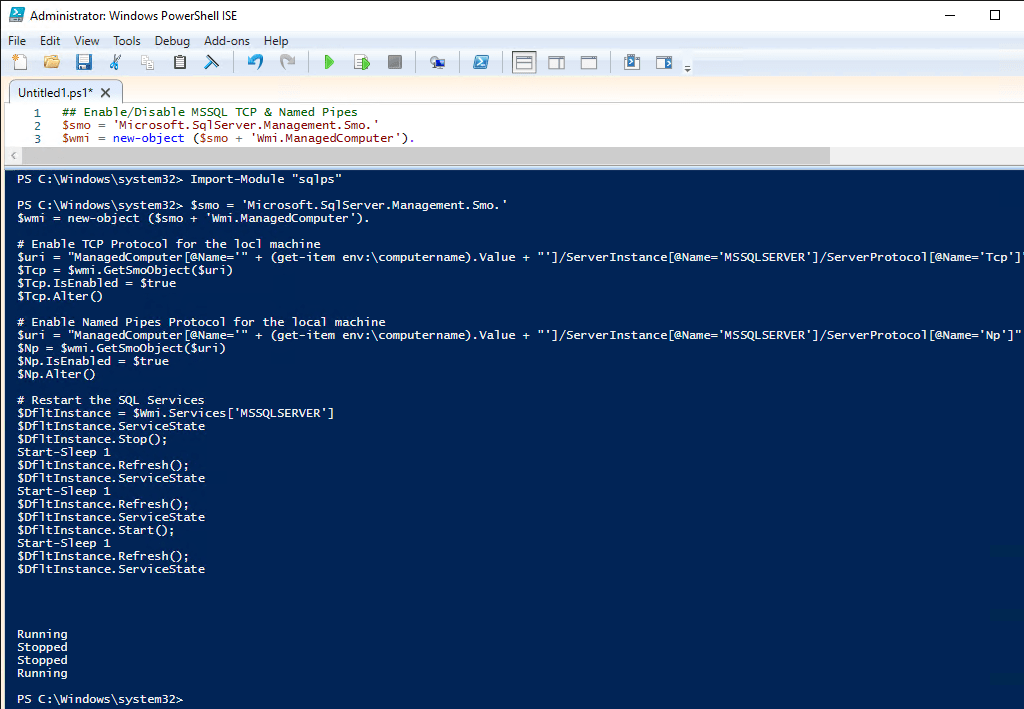
If you are working with named instances, adjust the instance name and service accordingly. Do not assume MSSQLSERVER applies everywhere.
Things to Check After Enabling TCP/IP
Enabling TCP/IP alone may not be enough.
Always verify:
- SQL Server is listening on the expected port (see: Get the SQL Server Default Ports)
- Windows Firewall allows inbound traffic
- Network firewalls or security groups permit access
- Clients are connecting using the correct protocol
If you need to confirm the connected server IP and port from inside SQL Server (what your session actually hit), see: How to Get the SQL Server IP Address.
Related posts that pair well with this step:
Final Thoughts
If SQL Server can’t accept TCP connections, nothing else matters.
Enabling TCP/IP is a small configuration step, but it sits right at the foundation of connectivity. Whether you use Configuration Manager or PowerShell, always remember:
- Changes require a service restart
- Verify connectivity immediately after
- Don’t assume defaults are enabled
This is one of those checks that solves problems quickly, when you remember to look for it.
Leave a Reply